How to Create a Bootable USB Using Rufus


Asif Mohammad Sovon
Asif Mohammad Sovon, IT Assistant at Bangladesh Air Force and Fileion tech writer, simplifies tech t...
You have a fresh ISO file sitting on your desktop. Maybe it is Windows 11, Ubuntu, or a recovery tool. But how do you actually put it onto a USB and make your computer boot from it?
That is where Rufus comes in. It is one of the most trusted tools for creating bootable USB drives. Millions of IT professionals, students, and everyday users rely on it to install operating systems, run live environments, and fix broken systems.
In this guide, you will learn exactly how to use Rufus from start to finish. No technical background needed.
Let's dive into the basics before moving to the hands-on steps.
What is Rufus?
Rufus is a free, open-source utility for Windows. It converts a standard USB flash drive into a bootable device using an ISO image file.
Students use it to install Linux for the first time. IT professionals use it to deploy Windows across multiple machines. Every day, users use it to repair a computer that won't start.
Key Features
Rufus is significantly faster than most bootable USB tools. It formats and writes data quickly, even on older hardware.
Rufus supports MBR and GPT partition schemes and works with FAT32, NTFS, exFAT, and UDF file systems. This means it works with both legacy BIOS and modern UEFI systems.
Rufus runs as a standalone executable. You do not need to install anything. Download it, open it, and start working.
Step-by-Step Guide: How to Create a Bootable USB Using Rufus
-
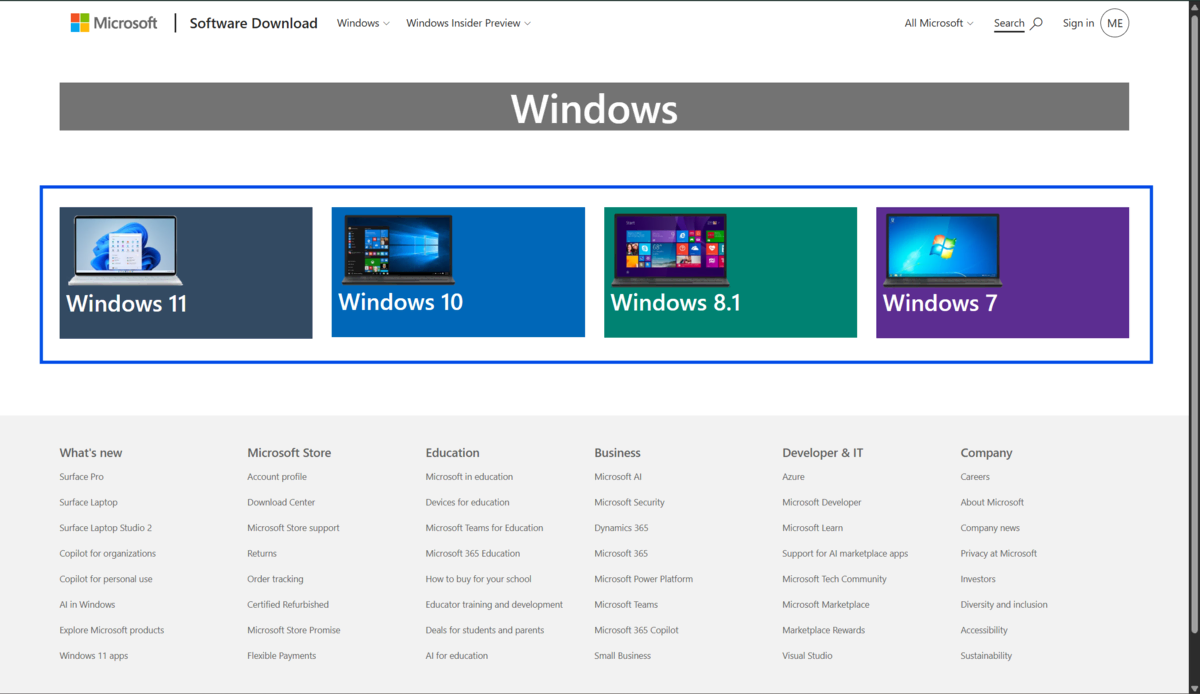
Download a verified ISO file from the official source of the operating system you want. For Windows, use the Microsoft website. For Linux, use the official distribution page.
-
Insert a USB drive into your computer. The drive should have at least 8 GB of space. Make sure it has no important files on it because the process will erase everything.
-
Download Rufus from Fileion. It is a small file; no installation is needed.
-
Open Rufus by double-clicking the downloaded file. If Windows asks for permission, click Yes.
-
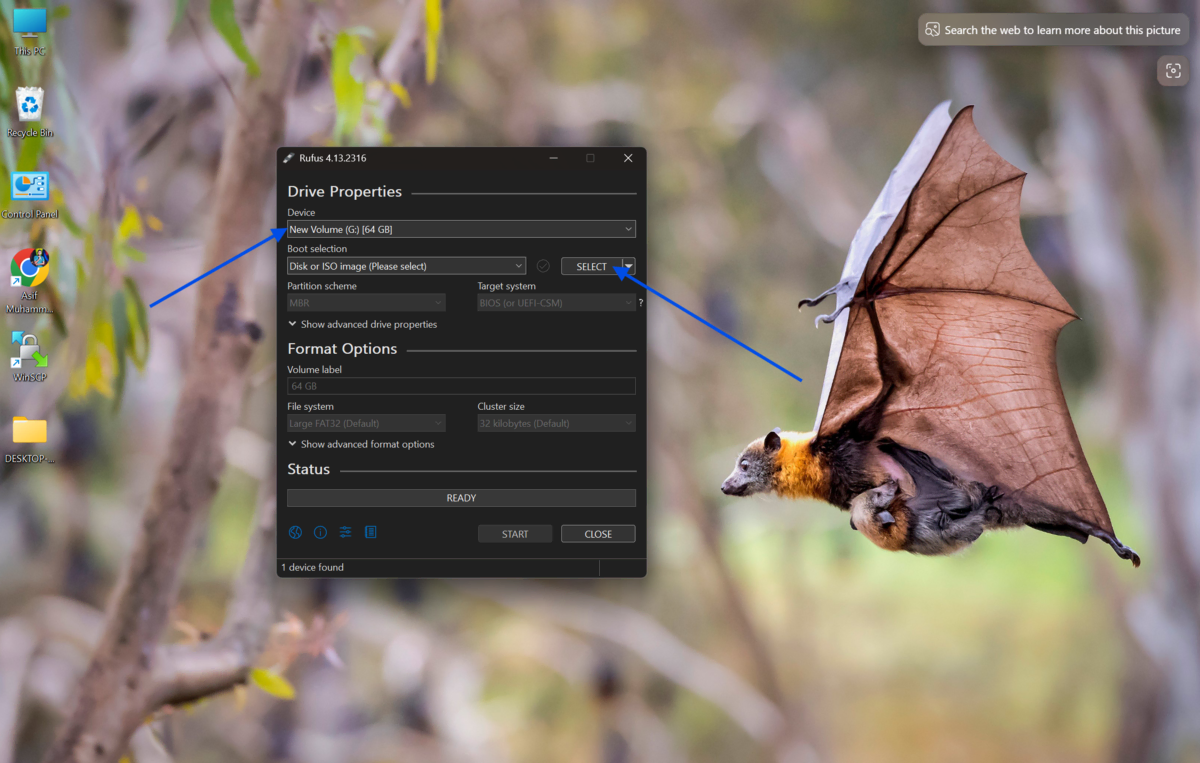
Under the "Device" dropdown at the top, select your USB drive. Be careful here. Choose the correct drive to avoid wiping the wrong device.
-
Under "Boot selection," click the "Select" button and browse to your downloaded ISO file. Rufus will automatically detect the image type.
-
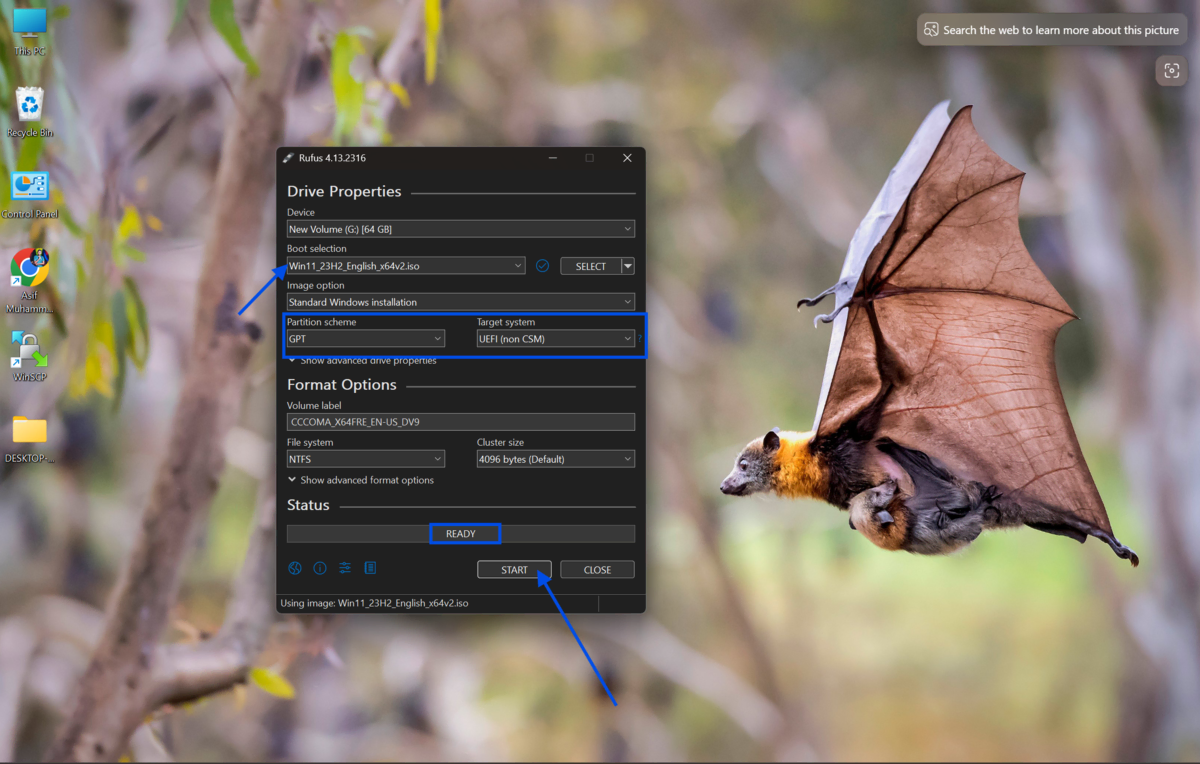
Check the "Image option" field. For most users, "Standard Windows installation" or "ISO Image" mode is correct. Leave it as detected unless you have a specific reason to change it.
-
Set the partition scheme. If your computer uses UEFI (most computers made after 2012), select GPT. If it uses legacy BIOS, select MBR. Check your system settings if you are unsure.
-
Set the file system. Rufus usually sets this automatically based on your ISO. For Windows, NTFS is standard. For Linux live drives, FAT32 works in most cases.
-
Leave the cluster size and volume label at their default values unless you know what you are changing and why.
-
Click the "Start" button. Rufus will warn you that all data on the USB will be destroyed. Confirm by clicking OK.
-
Wait for the process to complete. The progress bar at the bottom will fill up and turn green. When it says "Ready," your bootable USB is done. Safely eject the drive.
Quick Tips
-
Always download your ISO from the official source. Third-party sites may offer modified or infected files.
-
If your USB is not detected, try a different port or restart Rufus as an administrator.
-
For persistent Linux USB drives, look for the "Persistent partition size" slider that appears after you select a compatible Linux ISO.
-
Use the "Check device for bad blocks" option if you are using an older USB drive to catch errors before they cause problems.
Common Mistakes to Avoid
-
Using MBR on a UEFI system will prevent your computer from booting. Always match the partition scheme to your system firmware type.
-
Rufus erases everything on the USB. Users often forget this and lose files. Always copy important data off the drive first.
-
If your ISO is incomplete or corrupted, the bootable USB will fail. Verify the ISO using its SHA256 checksum, which official download pages usually provide.
-
If Rufus reports a written error, do not ignore it. It usually means the USB drive is damaged or too slow. Replace the drive and try again.
Pricing and Availability
Rufus is completely free. There is no paid version, no subscription, and no premium tier. It is an open-source project maintained by volunteers and developers on GitHub.
It is available only for Windows. You can download the latest version of Rufus directly from our site to ensure you get the most current, safe release.
Final Verdict
Rufus is one of the most reliable tools for creating bootable USB drives. It is fast, lightweight, and free. It works for installing Windows, trying Linux, recovering systems, and much more.
If you need to create a bootable USB, Rufus is the practical first choice for beginners and professionals alike.
FAQs
Is Rufus safe to use?
Yes. Rufus is an open-source tool with a long-standing reputation in the tech community. Always download it from a trusted source to avoid tampered versions.
Can Rufus create a bootable USB for Linux?
Yes. Rufus supports a wide range of Linux ISO files, including Ubuntu, Fedora, Debian, and many others. It also supports creating persistent live USB drives for select distributions.
How long does Rufus take to create a bootable USB?
The time depends on ISO size and USB speed. A typical 5 GB Windows ISO takes between 5 and 15 minutes to write to a USB 3.0 drive.
Does Rufus work on Windows 11?
Yes. Rufus fully supports Windows 11 and includes options to bypass certain hardware requirements during installation if needed.
Can I use Rufus on macOS or Linux?
No. Rufus only runs on Windows. For macOS, balenaEtcher is a popular alternative. For Linux, the dd command or GNOME Disks are common options.
Comments
Let us know about your thoughts
Explore more articles related to Rufus
Here you will find all the latest tips and tricks about Rufus. Also you will get many solution of problems which you may face while using this app.

The Complete Bootable USB Drive Creation Tool
Rufus is the ultimate solution to format and create bootable USB flash drives. It provides excellent bootable drive conversion without the need to install it! Whenever you need to format your USB sticks, Rufus is there to help.